Saddle stitch layout:
facing pages, eight pages, 3mm bleed all the way around

L R
8 1
2 7
6 3
4 5
Double click on master page to display the master page:

When the master page is displayed you can create something on the master page and it will automatically appear on all the pages of your document. Things you can put on your master page to reappear:
- text frames
- graphic frames
- text
- images
- colour
As you can see the box has appeared on every page of the document:

You can create a new master page by clicking on the little drop down box on the box with 'pages, layers and links' click on the drop down menu and click 'new master' then a box will appear named 'new master' where you will be given the option to rename 'prefix' and name, you then click OK.


All pages on your book will have automatic page numbers, to create this you go to the 'type' tab the top of the page, insert special characters>markers:

PRINTING BOOKLET:

Go to file>print booklet, then a window will appear with print booklet, this is where you can change the booklet type 2-up Saddle Stitch, 2-up perfect bound, 2-up consecutive.

On the options section in the window it gives you the chance to tick 'print blank pages' you should tick this


select 'short-edge binding'
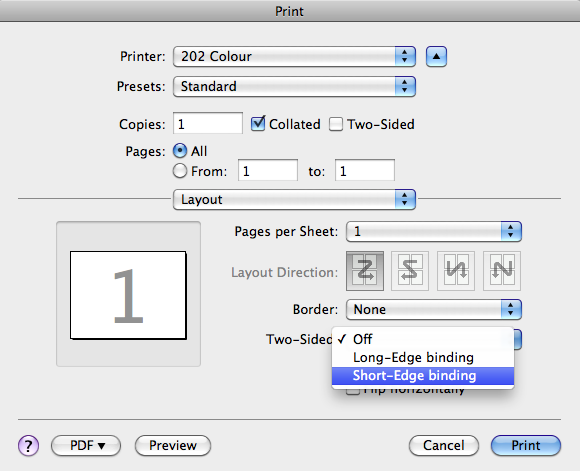
Double sided printing: 'Printer' options then 'layout' options, the two sided option is at the bottom, select short edge binding.
POSTSCRIPT:
PostScript is what your digital file is turned into and used when sending something off to print. It is like a PDF file.

We will use the Adobe PDF, this allows us to create a postscript to A0 and in between. You should be able to see your document ready to print in A2 including crop marks. Save this and now you should be able to open in preview when double clicking. Now open Adobe Distiller, choose the setting that you need, we press quality and then can drag the postscript file into the area.

USING ISSUU
Save your PDF as the smallest file size and embed the publication.
No comments:
Post a Comment